button on the Menu Bar. Selecting the Analysis Area > New Analysis Area command displays a small hatched selection area in the upper left corner of the "Display" pane.
Before creating a new analysis area, make sure your Pointer Mode is Identify, the button on the Menu Bar. Selecting the Analysis Area > New Analysis Area command displays a small hatched selection area in the upper left corner of the "Display" pane.

|
|
You can move the selection area in the "Display" pane by placing the inside the selection area and dragging. You change the selection area shape by grabbing the one of the ■ handles on the selection area border and dragging. Once you have the area selected, right-click anywhere in the "Display" pane and select Create New Analysis Area from the shortcut menu. Selecting Cancel from the shortcut menu will stop the entire new analysis area process and remove the selection area from the "Display" pane. |
Now your project window shows the new analysis area in the "Display" pane with the ![]() ♦ Fuel Model theme as the active grid. In the "Tree" pane the new analysis area is identified with the
♦ Fuel Model theme as the active grid. In the "Tree" pane the new analysis area is identified with the ![]() ♦ New Analysis Area item. Since there is now more than one analysis area in the FlamMap project the active analysis area item is identified with the
♦ New Analysis Area item. Since there is now more than one analysis area in the FlamMap project the active analysis area item is identified with the ![]() icon. Under this
icon. Under this ![]() ♦ New Analysis Area item there is a complete set of landscape grid themes and an empty ♦ Runs item. Any Runs or output grids from the parent analysis area are not included in the new analysis area.
♦ New Analysis Area item there is a complete set of landscape grid themes and an empty ♦ Runs item. Any Runs or output grids from the parent analysis area are not included in the new analysis area.
You can rename this ![]() ♦ New Analysis Area item to something more descriptive by clicking twice and editing right in the "Tree" pane.
♦ New Analysis Area item to something more descriptive by clicking twice and editing right in the "Tree" pane.

An exported analysis area can be used outside of FlamMap or used to create a new FlamMap project with smaller Project (.PRJ) and Archive (.FZA) Files.
|
|
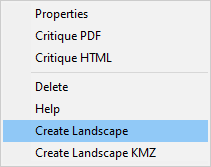
To save a new analysis area as a separate GeoTIFF (.TIF) or Landscape (.LCP) File right-click the You must choose either the GeoTIFF (.TIF) or Landscape (.LCP) File from the Save as type: drop-down menu. The GeoTIFF (.TIF) has several benefits,
|
|
|
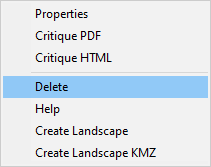
To delete an analysis area, right-click the FlamMap will not let you delete the ♦ Entire Landscape (Default) analysis area. Remember that deleting an analysis area will also delete the Runs and any unsaved outputs created for that analysis area. |