
You can create a Weather Stream File from several sources by using the Utilities > Get Weather command which opens the "Get Weather" dialog. Within a FlamMap Project with a loaded landscape opening the Get Weather utility will zoom to your landscape area with a blue shaded outline based on the landscape extent.
Since WIMS is being replaced as of September 30, 2025, it has been removed from the Weather Source: drop-down list. Don't panic, all the former WIMS stations are included in the Synoptic station list.
Select a Weather Source from the drop down list, there are four options available to retrieve a weather stream,
| Weather Source | Location | Date Range | Source | Resolution | Comments |
|
NWS MapClick Forecast |
Click the map anywhere in the United States. |
Seven days into the future from the current date/time. |
2.5 km grid |
|
|
|
Synoptic |
Select a weather station from the map. |
Any range 180 days prior to current time that obervations were collected. |
Includes observations from active RAWS, IRAWS, PRAWS, NRAWS, Portables, Quick Deploys in the Synoptic network. |
Point location of weather station. |
Appended 7-day forecast option available |
|
WFAS |
Click the map anywhere in the world. |
Ten days prior to current date/time and 14 days into the future. |
RTMA for prior weather, NDFD for first three days of forecast, and GFS for days 4-14 forecast. |
RTMA 2.5 km grid NDFD 2.5 km grid GFS 0.25° grid |
RTMA and NDFD only available in CONUS. Other locations utilize GFS for days 1-14.
Day 4-14 forecast is three hour interval. |
 to designate a location and file name for the Weather Stream File (.WXS) to be downloaded.
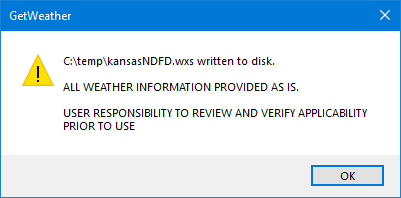
Some simple map controls are available to help select a station.

Clicking on a station pin show it's name, Synoptic ID, elevation, and a Select button that will select that station in the Station ID: box.
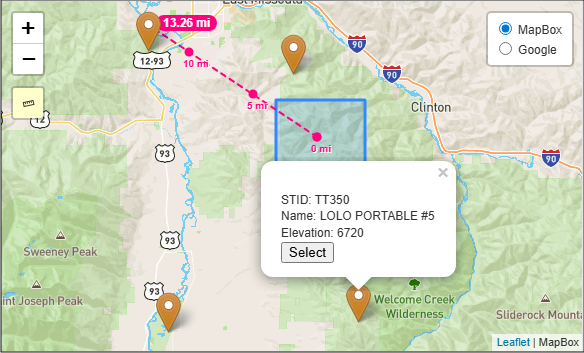
To use the measure tool, click it's button and the cursor changes to a crosshairs. Click on the starting point and move the cursor to your point of interest. Turn off the measure too by clicking it's button again.