help version 219, August 28, 2025
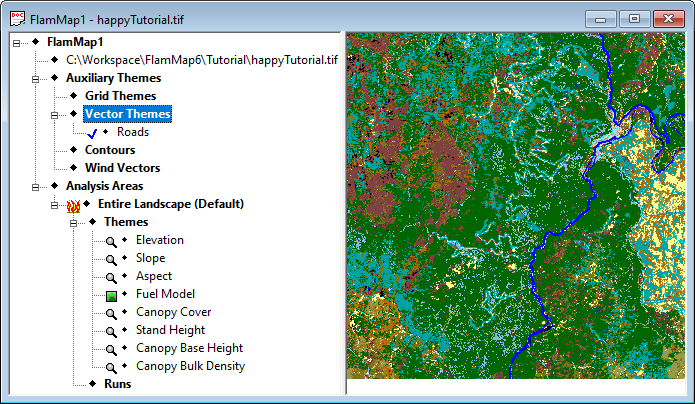
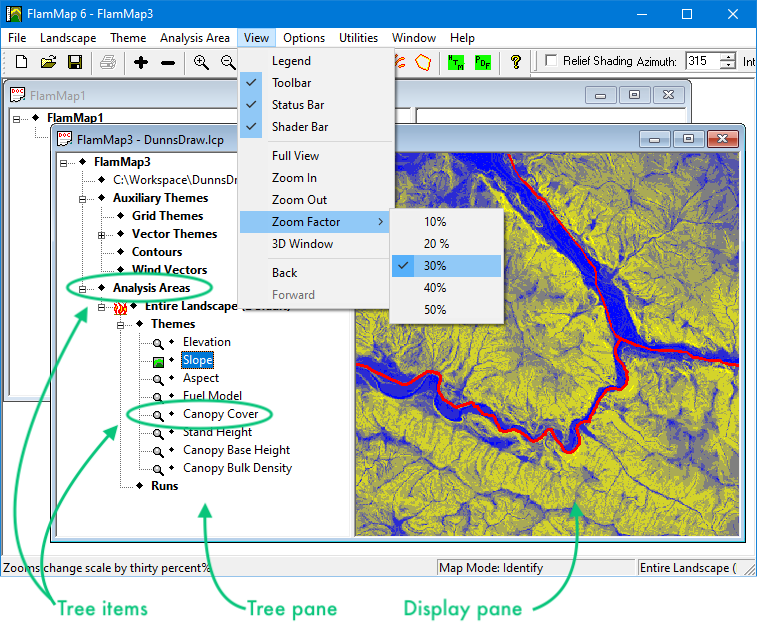
Using FlamMap is different from most Windows applications. Instead of utilizing menus, commands, and toolbar buttons, FlamMap uses an expanding tree structure in the left hand pane of the "Project" window to guide you through your work.
Menu commands and toolbar buttons are available for most operations but this help and tutorial system will focus on using context sensitive short cut menus activated when you right-click in the project window.
The left hand pane of the "Project" window contains the FlamMap "tree" which organizes all the files and parts of your FlamMap Project. Similar to Windows Explorer, the FlamMap tree can be expanded by clicking a ![]() where displayed. A
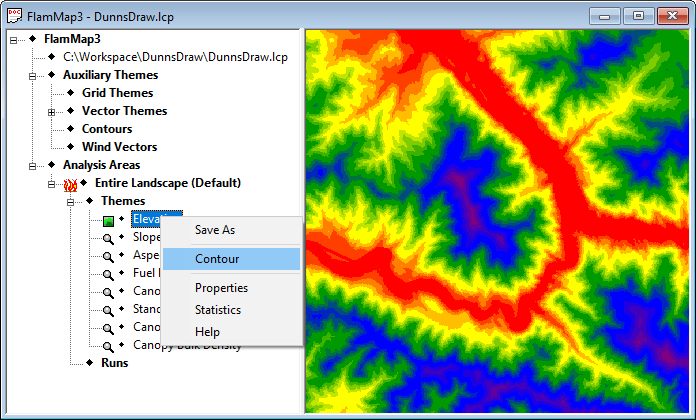
where displayed. A ![]() indicates that section can be collapsed by clicking. Right-clicking any of the tree items brings up a shortcut menu showing the commands available for that tree item.
indicates that section can be collapsed by clicking. Right-clicking any of the tree items brings up a shortcut menu showing the commands available for that tree item.
Once a FlamMap project has a landscape loaded various FlamMap runs or Farsite simulations can be set up and executed.
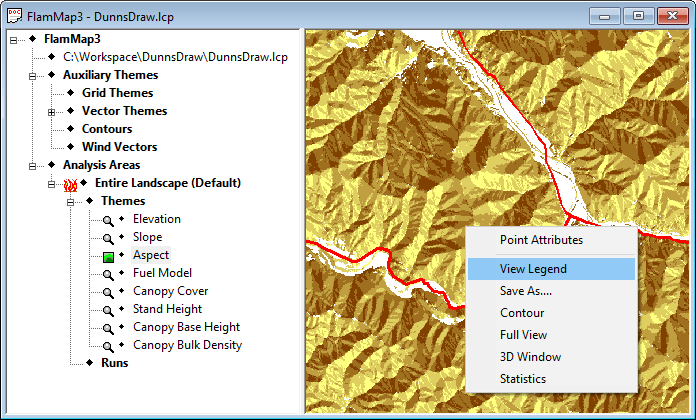
The right hand or "Display" pane of the "Project" window displays the active grid theme selected in the "Tree" pane and any active vector and contour themes. This display can be zoomed, colors changed, legends displayed, etc. by right-clicking and selecting from the shortcut menu.
If you're looking to modify a landscape to reflect recent disturbances or proposed treatments check out the Edit Landscape book
The individual Reference topics go into details about required input files, settings, descriptions of file formats, descriptions of data needed to run FlamMap, and various outputs. It is designed to be referenced from the other five main sections of the Help mentioned previously. Additionally, all these materials are linked to the various FlamMap dialogs and shortcut menus using a context sensitive help within the FlamMap application.
In the Technical Topics section you will find information explaining the background and science basis of the tools and models in FlamMap.
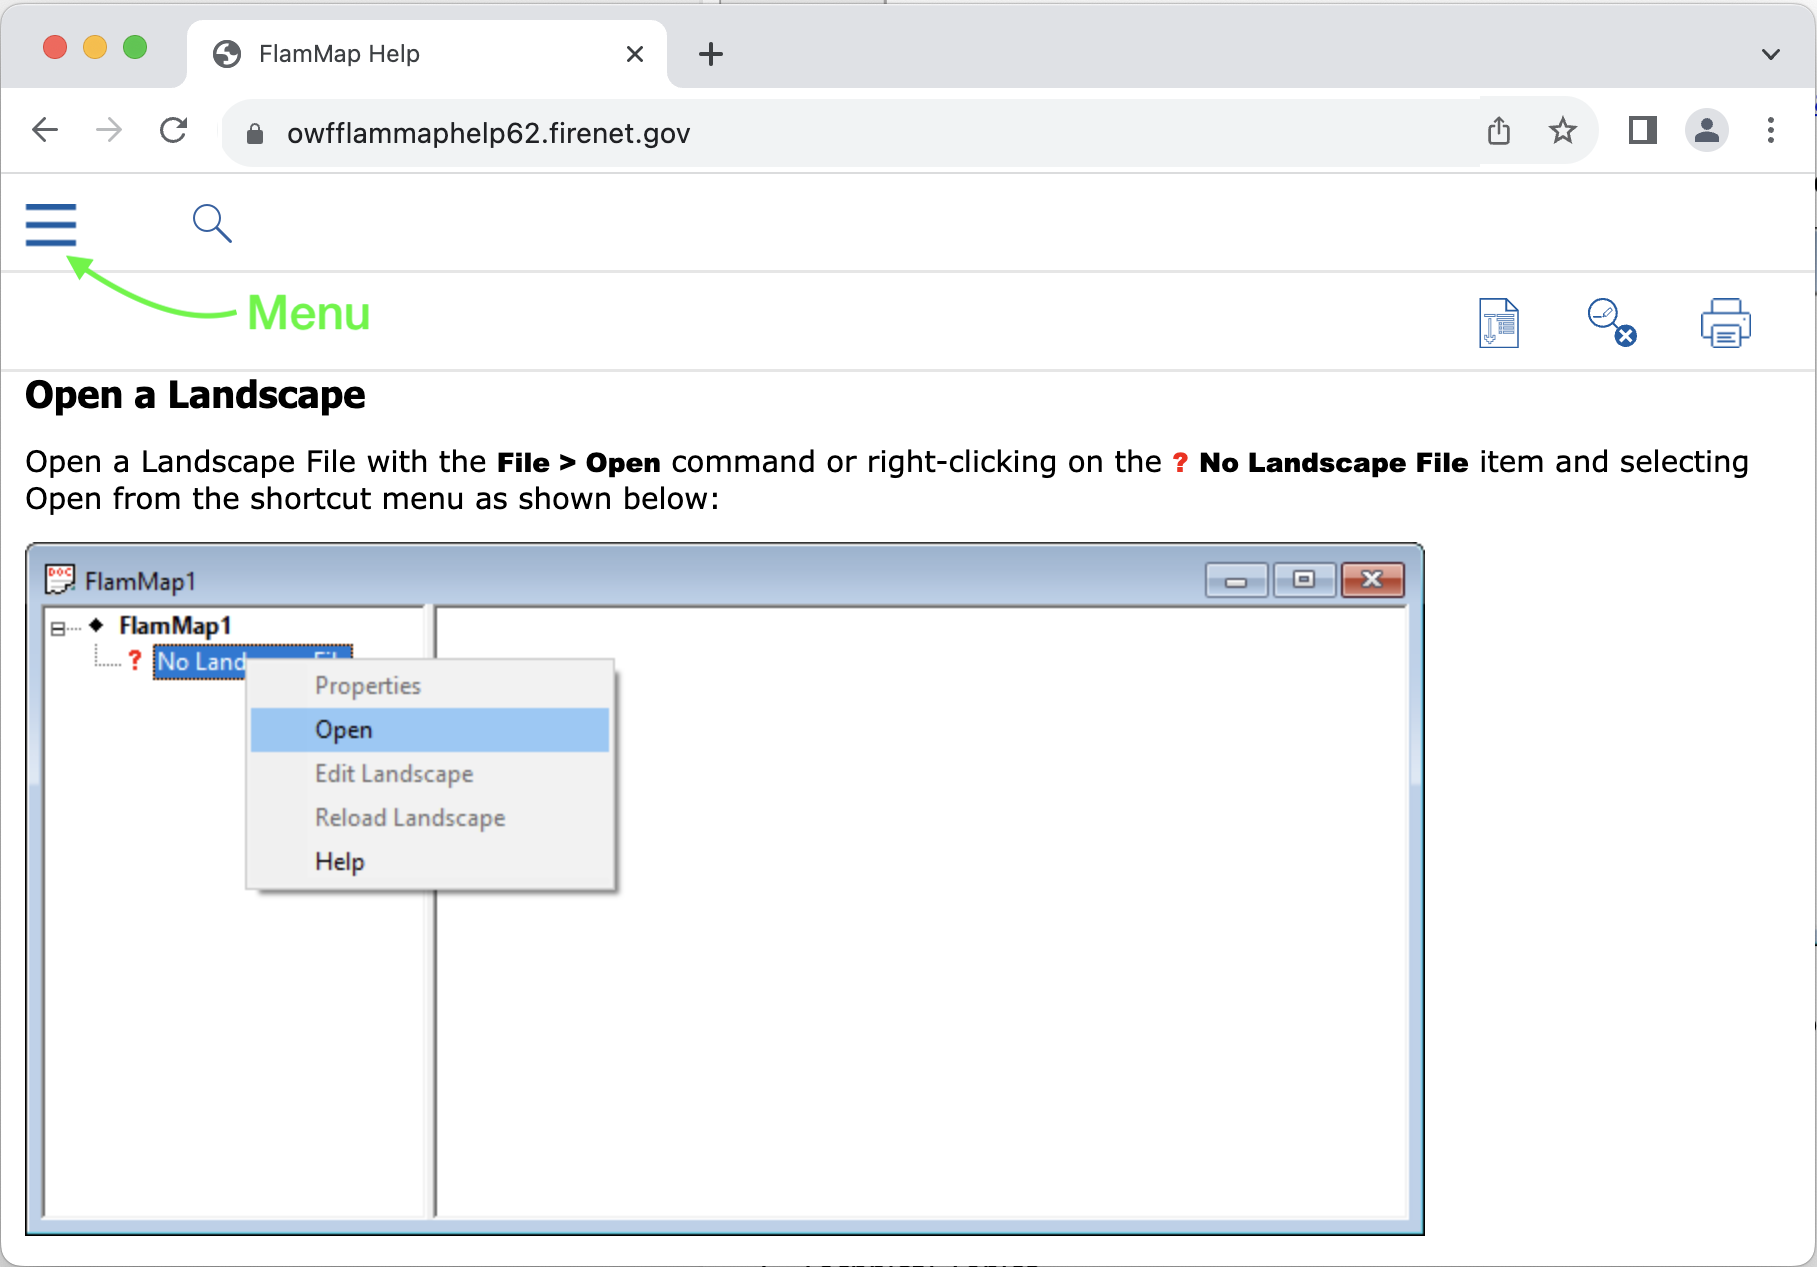
The Help > Help command opens a browser window displaying the FlamMap Help system.
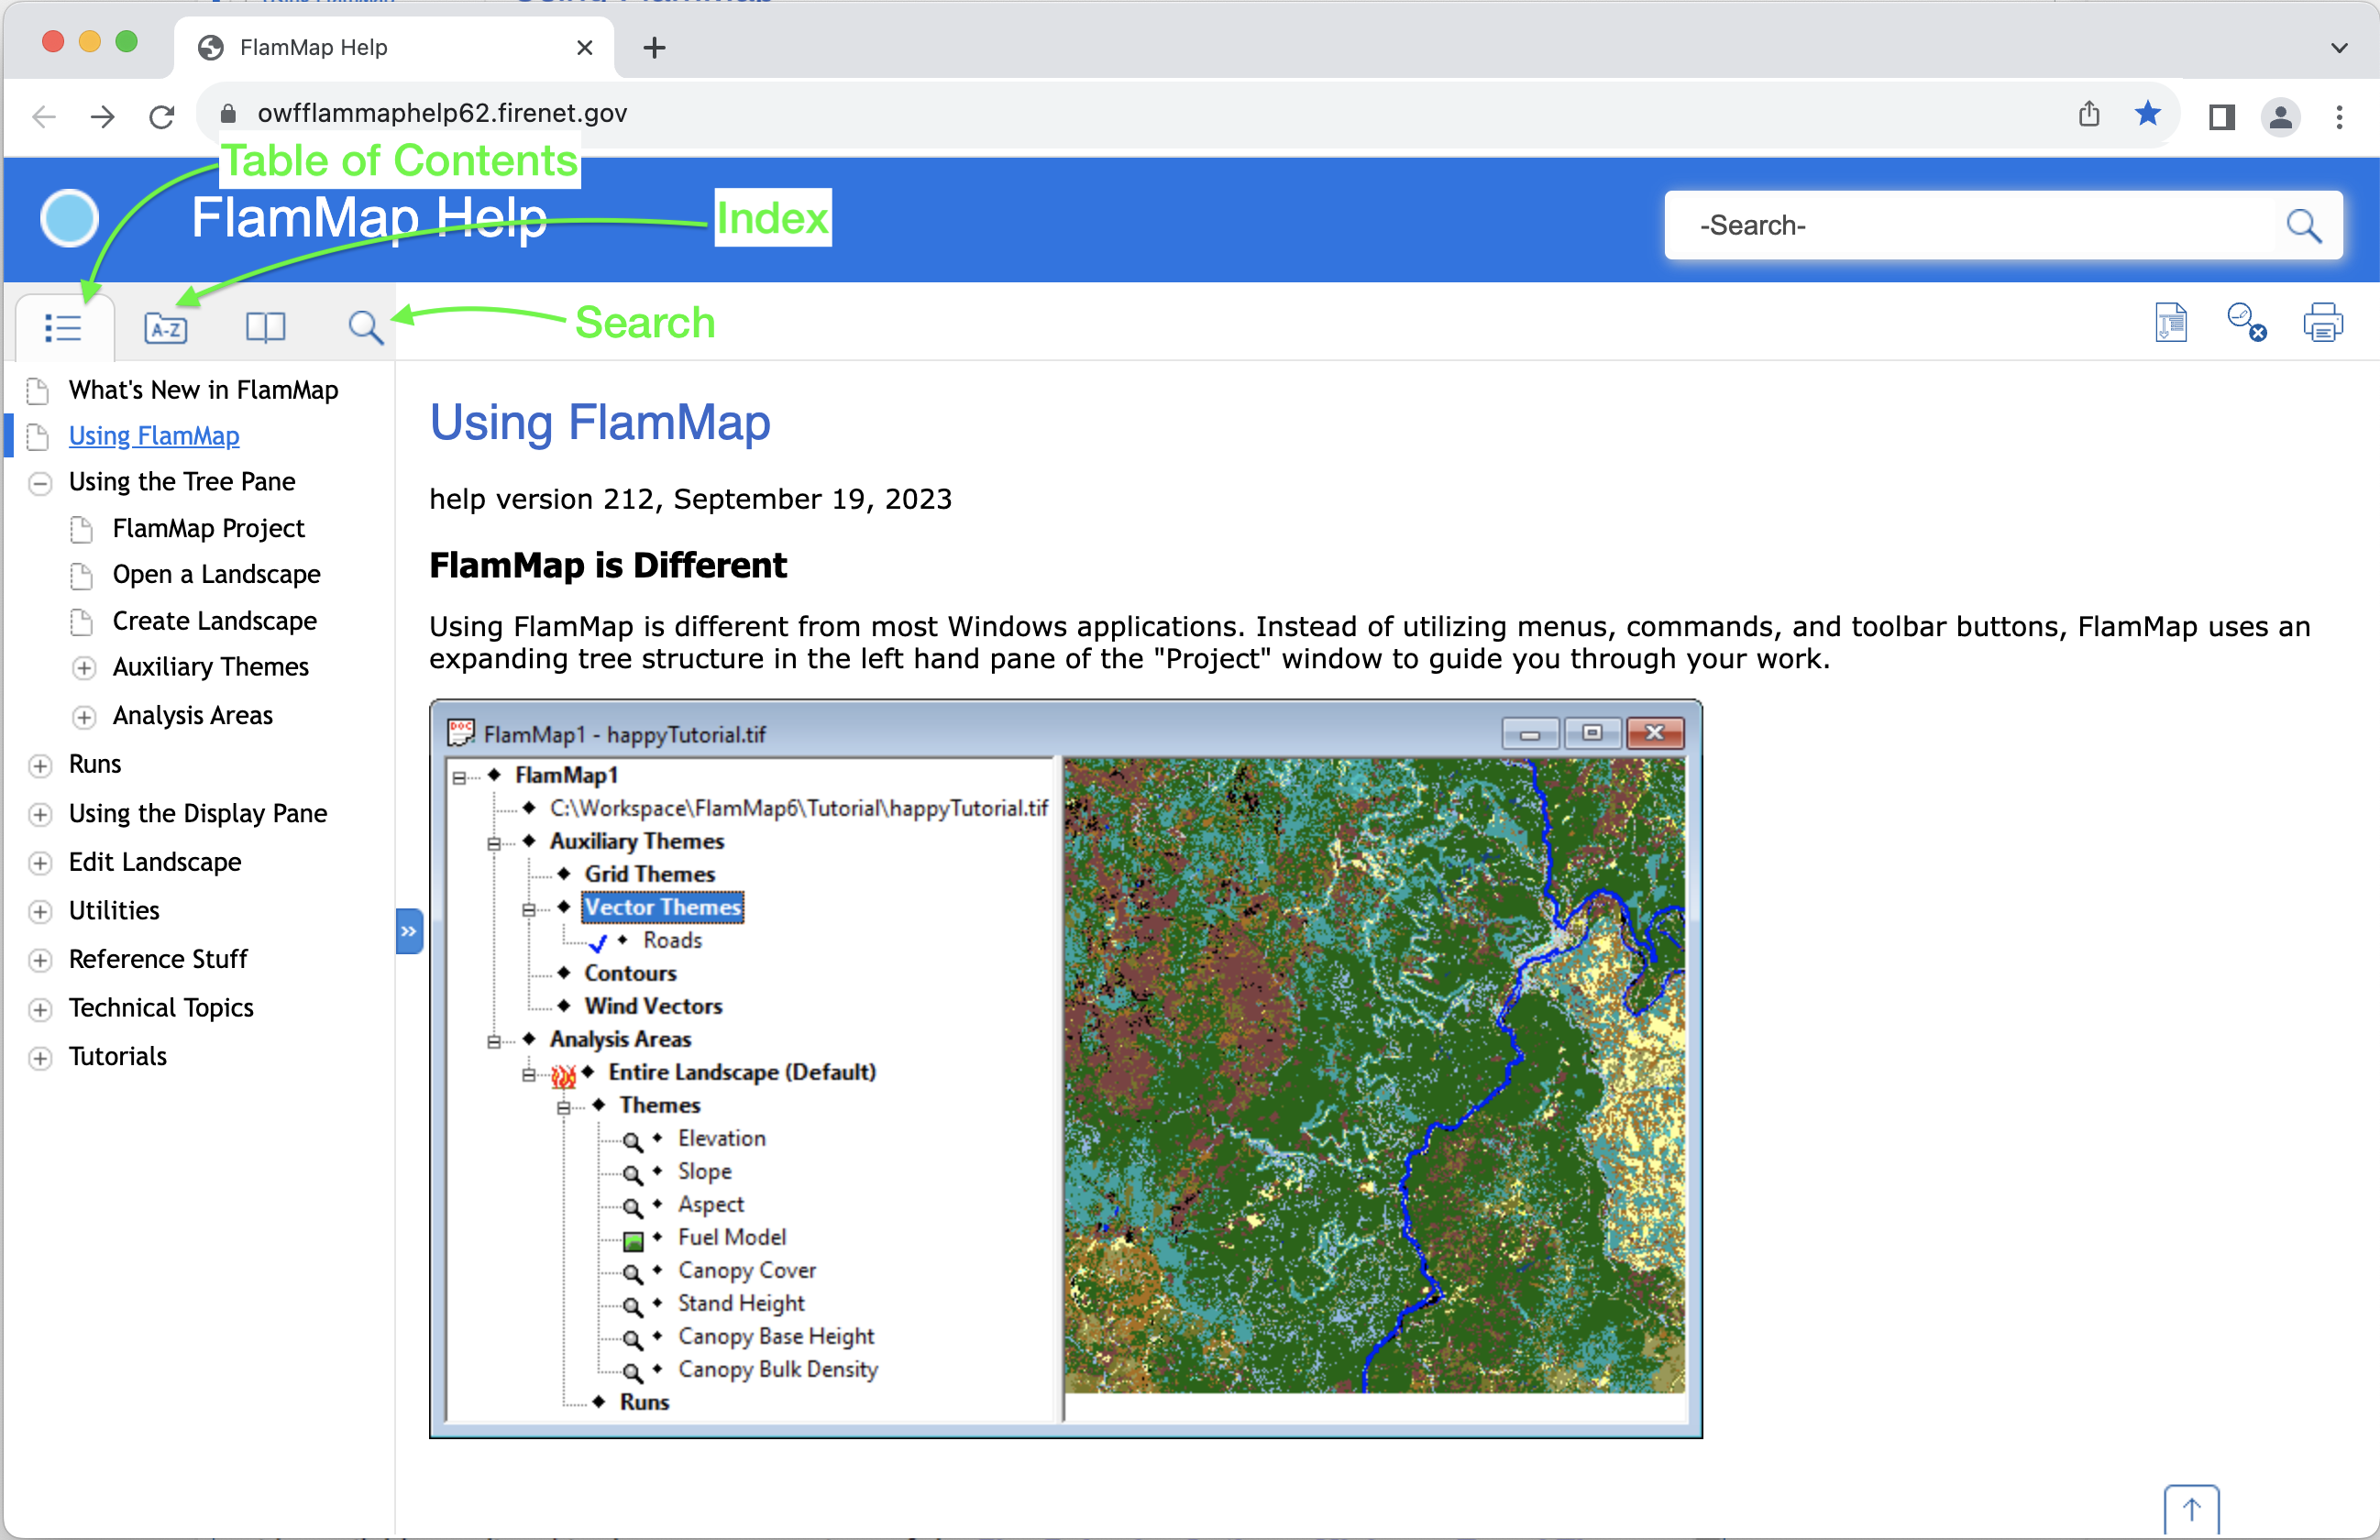
Note the Table of Contents, Index, and Search navigation links near left side of your browser window. Use these links to navigate to specific information in the Help.
There are also Help commands and buttons found in dialogs and menus (context sensitive help) throughout FlamMap. These commands will take you to a related help topic.
Depending on your browser window size the navigation links may not be visible, but can be displayed by clicking the Menu icon in the upper left corner of your browser window.
The FlamMap help system is composed of seven main parts, shown as "books" in the Help System navigation pane. They are;
The FlamMap help system is hosted on the internet so it will not be available when using FlamMap off line.
Numerous items and instructions appear throughout this guide. These following conventions are designed to make it easy to find and understand FlamMap Help.
Menu names, options, commands, tree items, and buttons are printed in bold type. i.e. click Open.
Menus, submenus, and commands are displayed with a greater than (>) symbol between items. i.e. View > Zoom Factor > 30%. This is equivalent to;
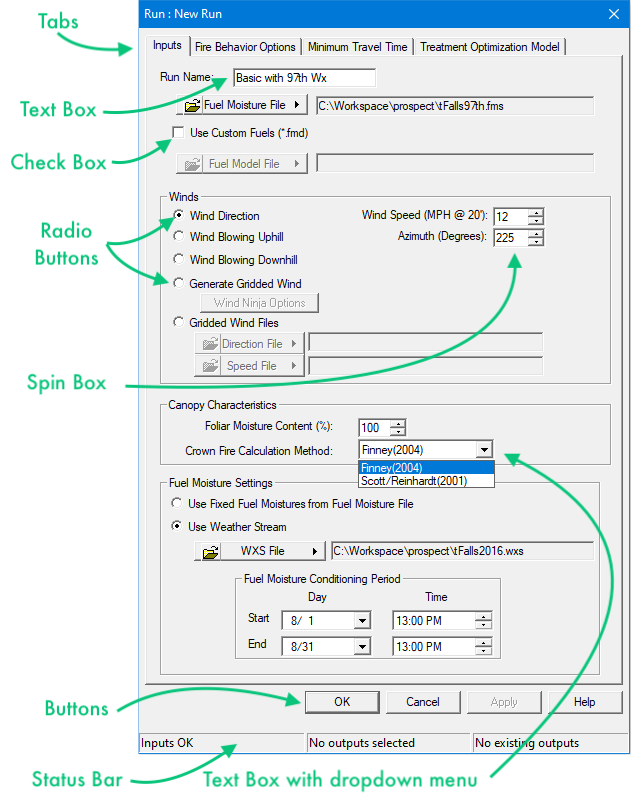
Below shows the names of common dialog box elements in FlamMap.
Key combinations that you should press appear in uppercase letters with bold type. If joined with a plus sign (+), press and hold the first key while you press the remaining one(s). i.e. CTRL+C
dialog box and window names begin with uppercase letters and are in quotes. i.e. "Select ASCII Raster File" dialog box opens.
Text you should type in appears in the Courier (typewriter) font. i.e. - First Tutorial