If you have closed your project or shut down FlamMap, you can reopen the project by selecting the File > Open command from the menu bar. In the "Open" dialog box select the file FirstTutorial.fmp and click the Open button. Your FlamMap project will display just the way it was when you last saved it.
In FlamMap one of the grid items is always the active theme and is shown in the "Display" pane. The active theme can be one of the themes in the Landscape or one of the Auxiliary or output Grid themes. The active theme item is identified in the "Tree" pane with the ![]() icon.
icon.
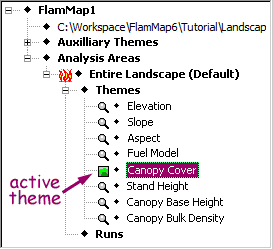
Select the ![]() ♦Fuel Model item to make it the active grid theme. To view the Legend for the fuel model theme, right-click in the "Display" pane (right hand pane) to display the following shortcut menu.
♦Fuel Model item to make it the active grid theme. To view the Legend for the fuel model theme, right-click in the "Display" pane (right hand pane) to display the following shortcut menu.
|
|
Click the View Legend command in the shortcut menu and the "FirstTutorial.fmp Legend" dialog box appears. |
|
|
Once a legend is displayed you can click on it's title bar and drag it anywhere, even outside of the "FlamMap" window. |
Make sure the ![]() ♦Fuel Model item is the active theme. Change your legend by clicking the Fuel Model button on the "Legend" dialog box to show the "Create/Modify Legend" dialog box.
♦Fuel Model item is the active theme. Change your legend by clicking the Fuel Model button on the "Legend" dialog box to show the "Create/Modify Legend" dialog box.
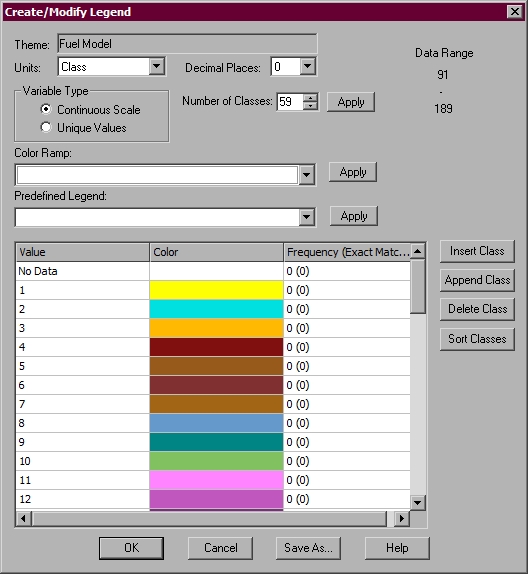
The Tutorial landscape does not contain all of the standard fuel models depicted in the default legend. You can simplify the legend by deleting the unused classes. Look in the Frequency column, which tells you how many of the grid cells have that value, and select one of the rows with a Frequency of zero. Click the Delete Class button to remove that class. You can select multiple classes to delete using the standard windows SHIFT or CTRL keys. Delete fuel models 1-13, 92, 103-109, 141, 143, etc. and your "Create/Modify Legend" dialog box should look like this.
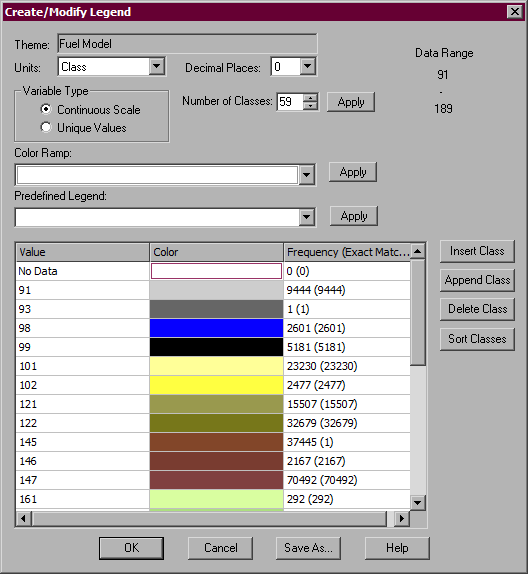
If you make a mistake, just click the Cancel button and start over by clicking the Fuel Model button on the "Legend" dialog box again.
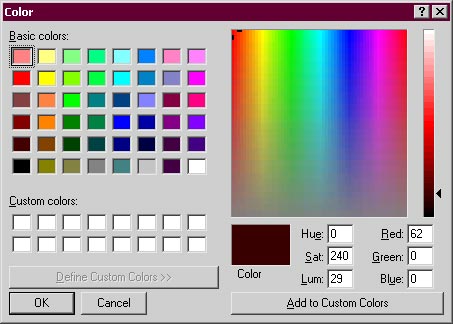
You notice that there is a small amount of Fuel Model 146 in the landscape and you want to know where it is. To make the areas of Fuel Model 146 stand out you'll want to make it a distinct color. Display the "Color" dialog box by double clicking the Fuel Model 146 color box in the "Create/Modify Legend" dialog box. Select the bright pink (3rd row, last column) from the Basic Colors: section and click the OK button.
Or if you want to create a custom color,
When you have deleted the unused Fuel Model classes and modified colors click the OK button in the "Create/Modify Legend" dialog box and the landscape will redraw with your new colors. Your "Legend" dialog box should look like this. Now you can see the scattered pink patches of Fuel Model 146 in the northeast quadrant of the "Display" pane.
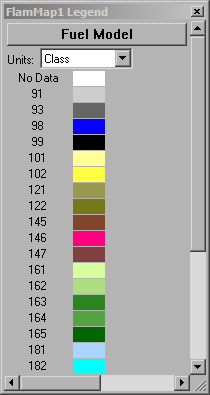
These colors will now be saved along with your project when you save it again.
To change the way a vector theme is displayed Use the "Properties" dialog box. Right-click on the ![]() ♦ Roads line in the "Tree" pane to display the following shortcut menu.
♦ Roads line in the "Tree" pane to display the following shortcut menu.
|
|
Click the Properties command and a "Properties" dialog box appears. |
|
|
Use the "Properties" dialog box to change a vector theme color, line style, and line width.
|
Even if you plan to continue now with this tutorial, you should save this project by following the procedures in the first lesson. Keep the project name FirstTutorial.fmp.
The next lesson will continue with other features to Control the Display Pane.