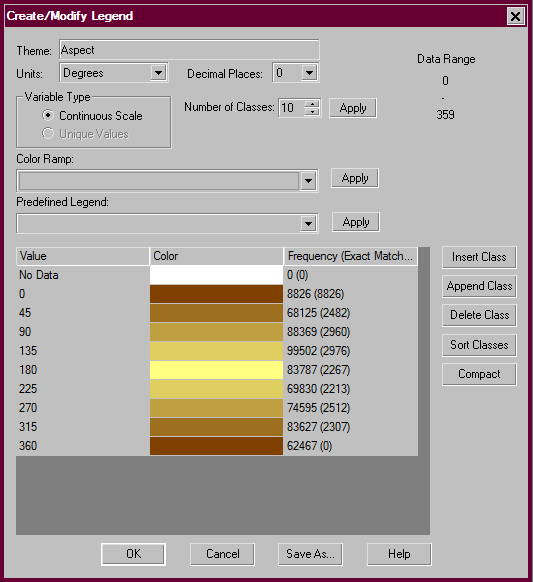
The "Create/Modify Legend" dialog is used to change the way the active grid theme is displayed. The "Create/Modify Legend" dialog can be displayed in several different ways;
This is a powerful, and thus complex feature, so you should practice with it before you attempt to use it with a deadline hanging over you.
Although grids from the Landscape (.LCP) File are used in the discussions below, the procedures apply to auxiliary and output grid themes too.

To help understand how to change grid themes it helps to get some definitions down first;
Continuous Values - These can have an infinite number of values. A grid theme such as elevation in complex terrain is obviously a continuous value. Crown bulk densities calculated from inventory data to 3 or 4 decimal places is another example of a continuous value. Canopy cover expressed as a percent where values can range from 0-99 is also a continuous value.
Class Values - Typically these have a small number of possible unique values usually expressed in categories. The fuel model grid is the most obvious. Crown Fire Activity expressed as categories 0 through 3 is another.
Some grids like slope or aspect can be thought of either way, in gentle terrain there may be only a dozen or two unique values. While in mountainous landscapes hundreds of values are possible. FlamMap will not let you display a grid with more than 100 values as unique values.
Each of the individual features in the "Create/Modify Legend" dialog is discussed in a separate heading below. Your changes will display only in the "Create/Modify Legend" dialog. They do not take effect in the "Display" pane or the "Legend" dialog until you click OK in the "Create/Modify Legend" dialog.
This text box displays the name of the active grid theme you are modifying, you cannot change it here. To modify the legend of another grid theme you need to close the "Create/Modify Legend" dialog and select another grid as the active grid and reopen the "Create/Modify Legend" dialog.
The unit choices for the active theme are shown in the Units: drop-down list. Typically the choices are English or metric. Take care when changing the units of output grids, see the Converting Units topic for more information.
NOTE: Auxiliary Grid Theme units are aways Class and cannot be changed.
For continuous and unique values you can select how many decimal places are displayed in the "Legend" and "Point Attributes" dialogs. However, the class and category values should rarely, if ever, have decimals. To change the number of decimal points displayed select from the Decimal Places: drop-down list.
If the grid variable type is continuous you can easily change the number of legend classes with the Number of Classes: spin box. This creates an evenly distributed number of legend classes across the data range. To create a legend with unevenly distributed classes or eliminate outlying values, use the procedures described in the Changing the Legend Classes heading.
You can also use the Number of Classes: spin box to modify a grid of unique values. Since this procedure eliminates information a more useful method uses the procedures described in the Changing the Legend Classes heading.
CAUTION: The use of evenly distributed classes can hide much of the interesting information in your theme. Typically in fire behavior, the information of interest is not evenly distributed, it's clustered at the low end of the scale. Also a single cell or point with a very high value can skew the legend. Spend the time to review the cell frequency and explore different legend arrangements.
The high and low values of the active grid are displayed here for your reference. You cannot edit these, but look carefully as you can easily discover problems with units or your grid values here.
When the Continuous Scale option button is selected you can choose the number of classes in your legend with the Number of Classes spin box. Then click the Apply button to see the effects in the "Create/Modify Legend" dialog. The active grid in the "Display" pane or the "Legend" dialog are not changed yet. You can continue to modify the number of classes until you are satisfied with the results.
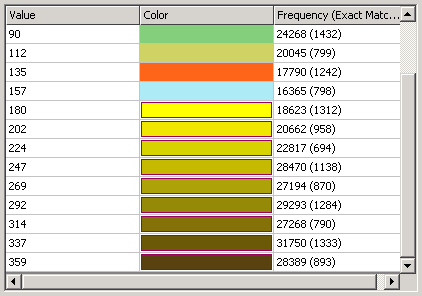
When you select the Unique Values: option button and click the Get Unique Values button FlamMap displays all the unique values of the active grid theme in the "Create/Modify Legend" dialog.
|
|
If there are more than 100 unique values FlamMap gives you this warning and will not let you use unique values. |
From the drop-down list in the Color Ramp: text box you can select a color ramp for your legend. The default ramps and any ones you have created are available. Select one of the ramps and click the apply button to see the effect in the "Create/Modify Legend" dialog. The three-color ramps are very good for grids with azimuth units as 0° and 360° then use the same color.
Predefined legends are specific value class and color schemes for a single theme type. Color ramps may seem similar but no value range, classes, or units are included in color ramps and they can be used for any theme type. There are some default color ramps in FlamMap and additional ones can be developed and saved. You can select a default or previously saved predefined legend from the Predefined Legend: drop-down list. The list only shows legends from the same type of grids (elevation, fuel model, rate of spread, etc)
Select the predefined legend from the drop-down list and click the Apply button. The legend in the "Create/Modify Legend" dialog will change, but the "Display" pane will not change until you close the dialog with the OK button.
Using predefined legends created in other projects can give strange results with some theme types. For example applying a predefined legend for elevation to a project it was not created in will almost always have a different data range. Since the data range and units are part of the predefined legend all the colors may not appear on the display. You can fix this by clicking the Apply button next to the Number of Classes: spin box, you do not have to manually change the number of classes. Other theme types, like aspect, where the data range is always the same can use predefined legends from other projects without problems.
An evenly distributed number of legend classes across the data range can easily be created by using the Number of Classes: spin box. However for more complex modifications to your legend, such as eliminating some outlying values or an unevenly distributed legend you can use the features described below. Use these techniques carefully as you can create some really strange legends.
You can modify the legend class boundaries simply by selecting the class value and editing it from your keyboard. You can also change the number of classes before changing the class boundaries.
The Frequency column for grid themes is for information only, you cannot edit it. There are two numbers for each class, the first is the number of grid cells in that class. The second number (in parentheses) is the number of grid cells that match the class boundary exactly. When the Unique Values option button is selected (and you haven't modified classes) the two numbers will be the same.
These numbers are useful for a quick understanding of the class distribution for a grid theme, especially an output grid. More information concerning a grid is available with the Statistics command.
This button inserts a blank class above the currently selected class in the "Create/Modify Legend" dialog box.
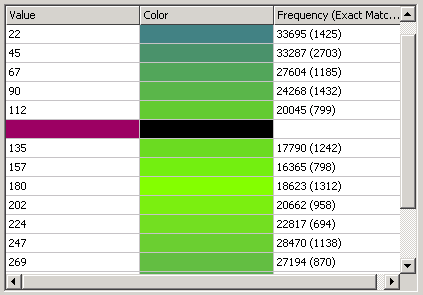
This new class has a blank value and is colored black. Double-click the empty value box to insert a value. Then follow the techniques for changing colors or reapply a color ramp.
The Append Class button inserts a blank class at the end of the legend classes in the "Create/Modify Legend" dialog. This new class has a blank value and is colored black. Double-click the empty value box to insert a value. Sort the classes, if needed, before changing colors or reapplying a color ramp.
This button deletes the currently selected class from the "Create/Modify Legend" dialog. You can select a range of classes to delete by selecting one class and then Shift-clicking a second class to select all the classes between the two selected classes.
After making several modifications to your legend in the "Create/Modify Legend" dialog you can end up with quite a mess. Click the Sort Classes button to rearrange your classes into ascending order again. You will also have to reapply any Color Ramp you have assigned to the legend. A Predefined Legend will no longer apply to the new legend so you will need to create a new Predefined Legend after re-sorting.
This removes all empty legend classes (except No Data class) in the "Create/Modify Legend" dialog.
You're not stuck with the color choices in the Color Ramp: and Predefined Legend: drop-down lists. You can change individual colors by using the "Color" dialog or use the ramping techniques described below.
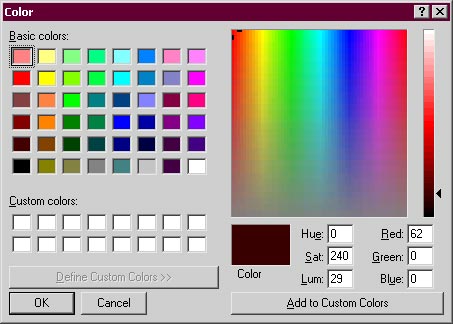
To change an individual color, display the "Color" dialog by double clicking a single color you want to change in either the "Create/Modify Legend" or "Properties" dialogs. To select a pre-defined color, simply click on the color you want from the Basic Colors: section and click the OK button.
To select a custom color;
select one of the white boxes in the Custom Color: section,
click in the rainbow section on the color you want, you can click as many times as you want until you get the color you want,
click the Add to Custom Colors button, your new color will appear in the Custom Color: section,
Finally click the OK button.
In addition to using the default color ramps in FlamMap, you can create your own. First change the color of the two ends of your ramp end points (you do not have to ramp the entire legend) using the "Color" dialog. Then select the range of values you want to ramp by selecting one end of the ramp and then Shift-selecting the other end.
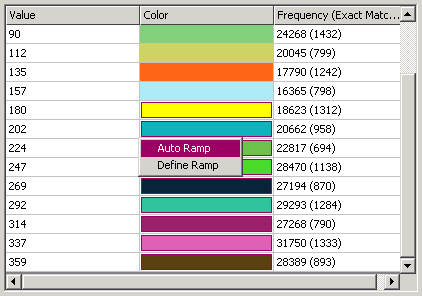
Selecting the Auto Ramp command from the shortcut menu ramps the colors between the top and bottom colors you have selected.
Another ramping option is to select the Define Ramp command from the shortcut menu. This displays the "Set Color Ramp" dialog where you can choose the end point colors of the ramp selected.
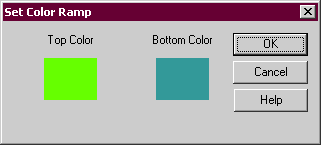
Double-clicking either the Top Color or Bottom Color swatch bring up the "Color" dialog where you choose you ramp end point colors.
Whether editing a displayed theme, new, or existing Predefined Legend with the "Create/Modify Legend" dialog you can save it as a Predefined Legend to use for similar grids in other FlamMap Runs or Projects.
To save edits as a Predefined Legend click Save As at the bottom of the "Create/Modify Legend" dialog to open the "Enter Legend Name" dialog.
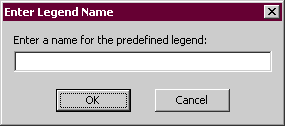
Enter a name (spaces and punctuations are valid) and click OK.
At this point the edits are only saved in the new Predefined Legend, not for the displayed theme or existing Predefined Legend being edited. At this point clicking OK or Cancel in the "Create/Modify Legend" dialog can have unintended results.
Clicking OK will save the edits to the displayed theme or existing Predefined Legend even if the a new Predefined Legend has been saved. If editing an existing Predefined Legend this creates two identical Predefined Legends with different names.
Clicking Cancel will not change the displayed theme or the existing Predefined Legend but new Predefined Legends will be saved.