
Grid or raster refers to a type of spatial data used by a GIS that consists of rows and columns of rectangular cells. Each cell contains values or attributes for that particular theme or layer. For example, if the theme is elevation, then the attributes will contain elevations in meters or feet. FlamMap uses raster data as inputs for all spatial data on topography, fuels, and crown structure. FlamMap can also export fire behavior information as raster themes for use in a GIS.
FlamMap can utilize two grid formats, Arc Grid ASCII and GeoTIFF.
Arc Grid ASCII format files can be used with any FlamMap feature that requires a grid or raster theme.
These files are quite simple and are supported by any GIS system. They can even be viewed, created, and edited with a simple text editor.
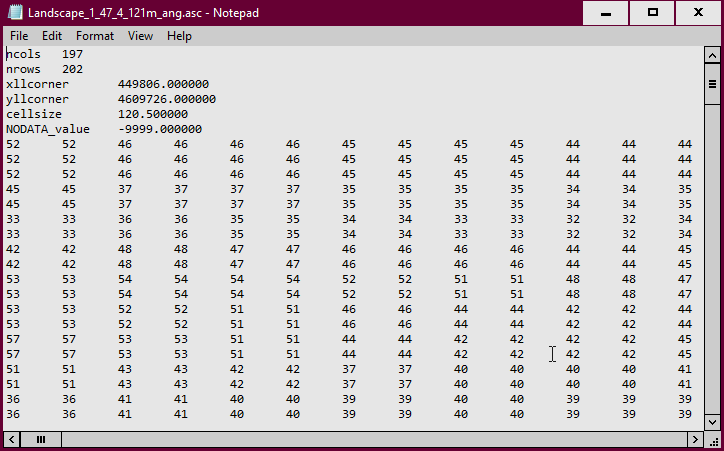
Arc Grid ASCII format raster files have a six line header describing the size and location of the represented data.
|
Keyword |
Description |
|
ncols |
number of grid columns |
|
nrows |
number of grid rows |
|
xllcorner |
lower left corner X coordinate |
|
yllcorner |
lower left corner Y coordinate |
|
cellsize |
size of the individual cells |
|
NODATA_value |
a default code for cells with no data |
After the header the individual cell values are simply arranged in rows and columns like you would see when viewing the file as a map feature.
GeoTIFF format files are a bit more complex as they have projection information embedded within, are compressed, and can contain multiple layers or themes known as bands.
Single band GeoTIFF format files can be displayed in FlamMap as Auxiliary Grid Themes, used to Create a Landscape, or as gridded wind inputs.
Raster outputs for an entire FlamMap, FARSITE, or SpatialFOFEM run can now all be saved in one multi-band GeoTIFF file with the Raster Outputs to GeoTIFF shortcut command.
Also a Landscape (.LCP) File can be converted to a multi-band GeoTIFF format file which can be used in FlamMap or viewed with a GIS.
 |
Outputs for an entire FlamMap, FARSITE, or SpatialFOFEM run can now all be saved in one multi-band GeoTIFF file or KMZ file. Right-clicking any individual run tree item displays a shortcut menu with the Raster Outputs to GeoTIFF and KMZ Output commands.
|
The KMZ Output command opens a "Save As" dialog box to save the run outputs in .KMZ format, for viewing in Google Earth or other geo-spatial viewers. This is a very convenient single file format for sharing FlamMap run results.
All output grid themes and landscape themes are included, using the symbology defined with the "Create/Modify Legend" dialog. Vector themes created by the run and displayed when the .KMZ file is created are also included using color and line style defined by the vector theme Properties dialog.
If this command is not available (greyed out) it is likely because valid projection information is not available for the ♦ Entire Landscape (Default).
The Raster Outputs to GeoTIFF command opens a "Save As" dialog box to save the run raster outputs in a single multi-band GeoTIFF format file.
An aux.xml file containing metadata will be also be created when saving a multi-band GeoTIFF.
 |
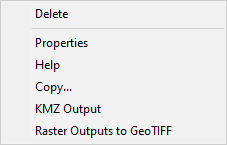
Right-clicking any individual grid theme (Auxiliary, Landscape, or Output) in the "Tree" Pane displays this short cut menu. Note the Delete command is not available for Landscape Themes or Output Grids, only Auxiliary Grids. |
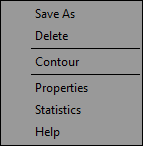
You can save your grids in several formats so you can use it in a GIS, image editor, or word processor. Right-click an individual grid theme from the "Tree" pane and select Save As… A standard Windows "Save As" dialog box appears where you can navigate and name your new file.
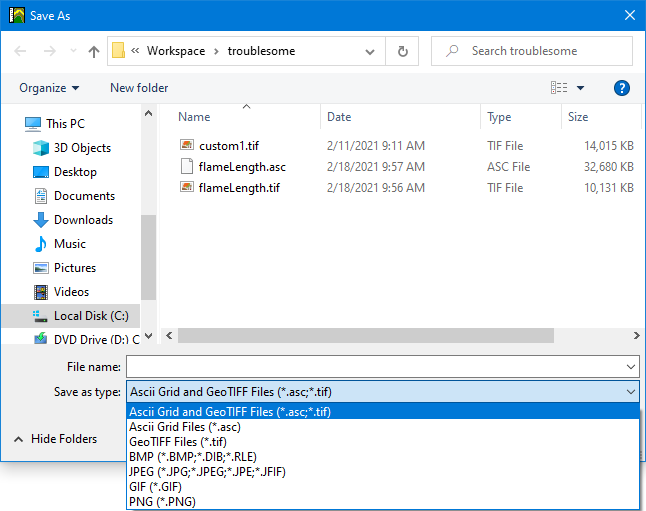
Grids can be saved in ASCII Grid or GeoTIFF file formats for exporting to a GIS.
For most GIS applications the GeoTIFF format has several benefits,
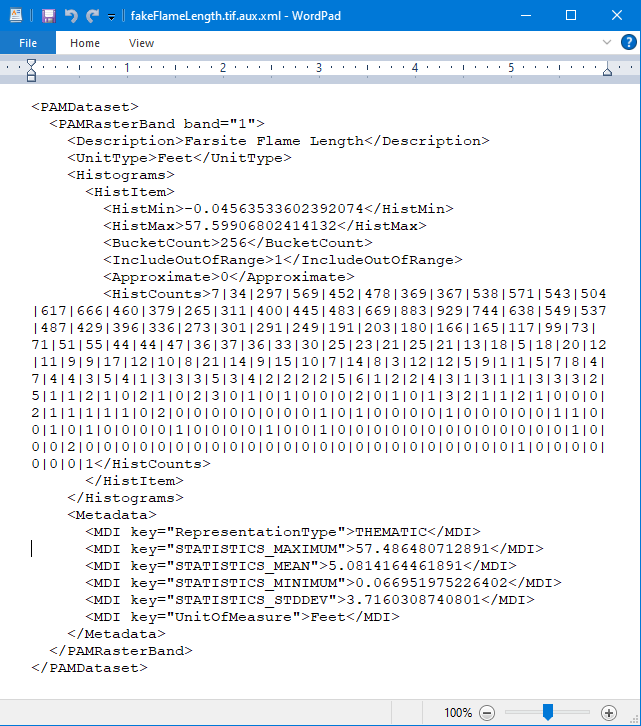
An aux.xml file containing metadata will be created for both ASCII Grid and GeoTiff file formats with the same name as entered in the Save As dialog. For example, "fakeFlameLength.tif" would have a companion file "fakeFlameLength.tif.aux.xml".
An aux.xml file can be viewed in a text editor like WordPad, like this flame length raster output.
Also Bitmap, JPEG, GIF, and PNG image formats are also available from the Save as Type: drop-down list for saving your FlamMap display window as an image for use in an image or word processor.
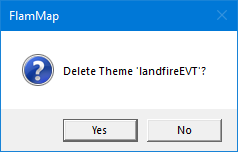
To delete a single Auxiliary Grid Theme, right-click the individual item in the "Tree" pane and select Delete from the shortcut menu. The following warning asks for confirmation of your delete request.
Note the Delete command is not available for Landscape Themes or Output Grids, only Auxiliary Grids.
Contours can be created from any landscape, auxiliary, or output grid. Contours can be used to overlay a grid's information on top of another grid theme. In the image below a contour of the elevation grid is overlaid on the canopy base height grid.
Create contours by right-clicking a grid theme item in the "Tree" pane or the "Display" Pane and selecting Contour from the shortcut menu to display the "Contouring" dialog box. Not all grids make sense for contouring, many grids will have strange results when contoured. MTT Arrival Time and Elevation grids are best suited to contouring.
For Farsite simulations it is suggested to save the Farsite Perimeters instead of contouring the Farsite Arrival Time grid. The visible perimeters can be modified with the "Farsite Perimeters" dialog.
|
|
The Theme Value Range gives the range of values over the theme for the entire landscape. You cannot edit this range. The Units: are whatever the grid theme is currently displayed in. Select either the Equal Intervals or Use Legend Classes radio button.
Select the Create Polygons check box for polygon geometry contours, leaving the check box cleared will create line geometry contours. Lines may not include the final perimeter when contouring MTT Arrival Time grids, so utilize the polygon option in that case. When exporting to a GIS lines and polygons will have different display properties. Click the OK button and the contours will be generated and displayed in the default black color. |
Some grid themes can be converted to polygon vector themes and then displayed as Auxiliary Vector Themes. This command works best on categorized themes with a minimal number of categories such as TOM Treatments or Crown Fire Activity. Continious grid theme like Flame Length or ROS will usually just create a polygon for each raster cell.
Right clicking a raster or grid theme and selecting the Polygoize command displays the "Polygonize Raster Layer" dialog.

Click the  button from the Destination text box. In the "Save As" dialog navigate to a destination folder and type a file name in the File Name text box. To add the new vector layer to the Auxiliary Vector Themes select the Add Resulting Vector Layer to Vector Themes check box.
Then click the Create File button to finish and the new vector layer is visible in the "Display" pane.

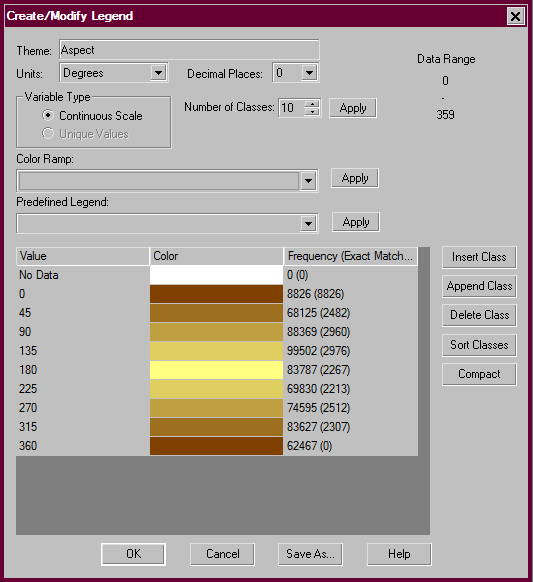
The Properties command displays the "Create/Modify Legend" dialog where you can change the colors and ranges of values your grid theme displays.
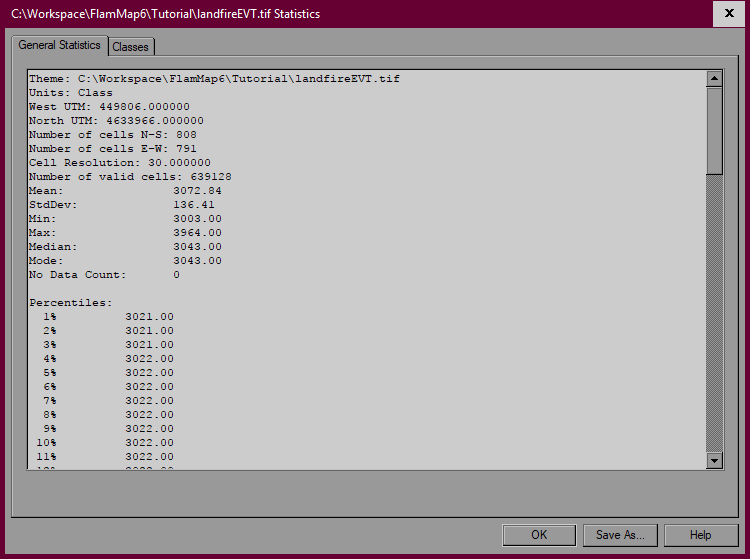
The Statistics command displays the "Theme Statistics" dialog which consists of two tabs. The first is the General Statistics tab which displays general information about the grid theme and summary statistics.
NOTE: For themes with class units some of the summary statistics are meaningless.
The Save As button opens a "Save As" dialog box for the user to save the tab contents in a plain text (.TXT) format file.
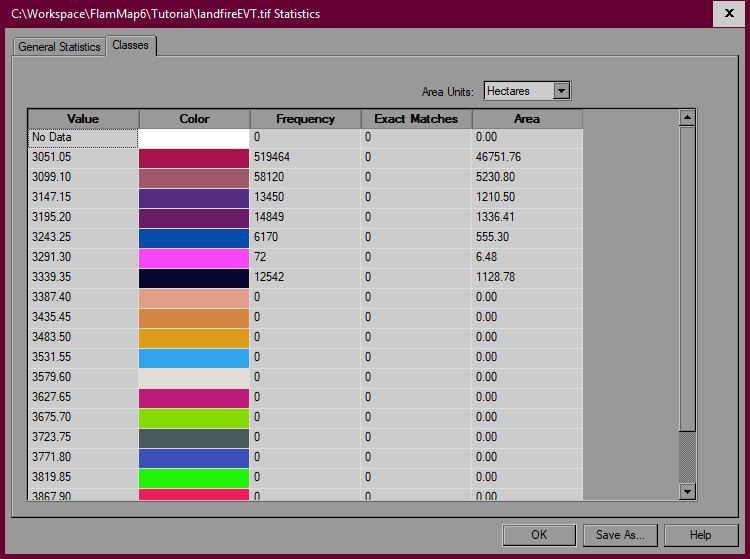
The second Classes tab displays the legend bins as determined by the "Create/Modify Legend" dialog box. Cell frequency and area data is also shown.
The Save As button opens a "Save As" dialog box for the user to save the tab contents in a comma separated value (.CSV) format file which can be imported into a text editor or spreadsheet application.
Selecting the Help command will bring you to the Auxiliary Grid Themes heading above in this online help system.
