This lesson will lead you through a simple SpatialFOFEM run where you will estimate PM2.5 emissions for an entire landscape. Other SpatialFOFEM lessons include,
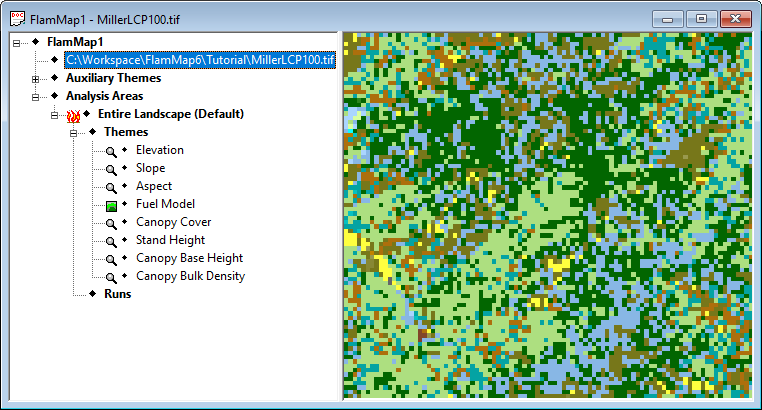
Start with a new FlamMap project and right-click on the ? No Landscape File item, select Open, navigate to the ...\FlamMap6\Tutorial\ folder and select MillerLCP.tif for your Landscape.

Right-click on the ♦Runs tree item (currently the bottom item) in the "Tree" pane to display this shortcut menu:
|
|
Select the New SpatialFOFEM Run command from the shortcut menu to open the "SpatialFOFEM Run:New SpatialFOFEM Run" dialog. |
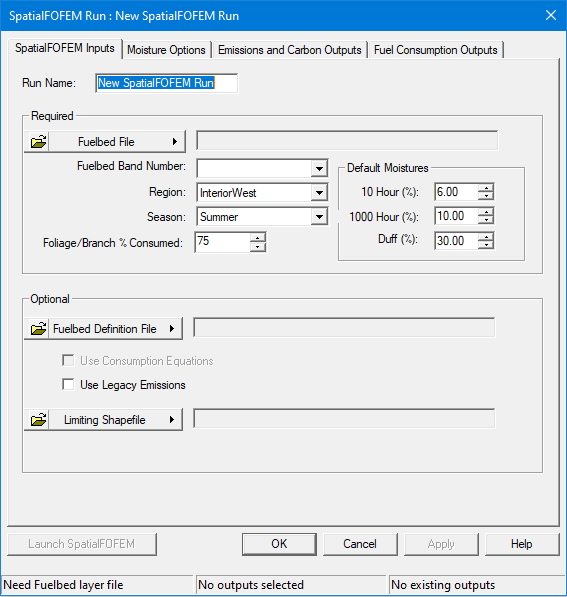
First thing, change Run name: to "Simple PM2.5"
Click the  button and select Open Fuelbed Identifier File. Navigate to the C:\...FlamMap6\Tutorial\ folder and select the "MillerLCP.TIF" file and click Open. (Yes, the Fuelbed Identifier File is included in this landscape.) Best practice to get a FCCS theme is to use the Utilities > Get Landscape tool and include the FCCS theme in your Landscape File. This eliminates issues with projections and extents.
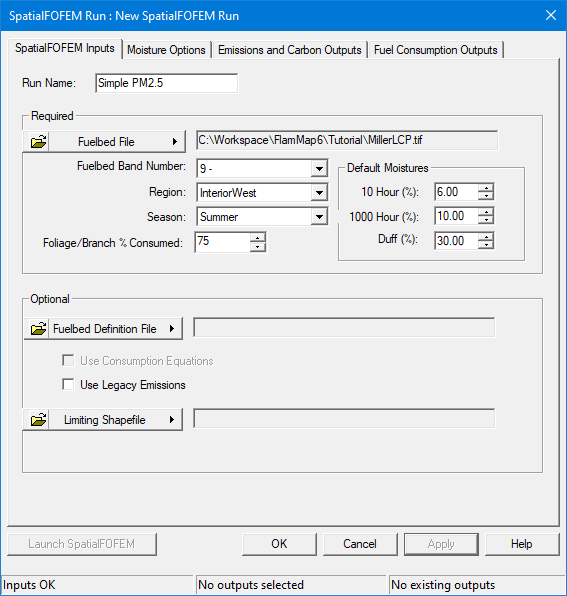
Next select the Emissions and Carbon Outputs tab. In the Fuel Emissions Output: group select the Flaming, Smoldering, and Total columns for the PM25 row. Click Apply and your Emissions and Carbon Outputs tab should look like this.
Click  and the run should complete in a few seconds.
Close the "SpatialFOFEM Progress..." and "SpatialFOFEM Run:" dialogs.
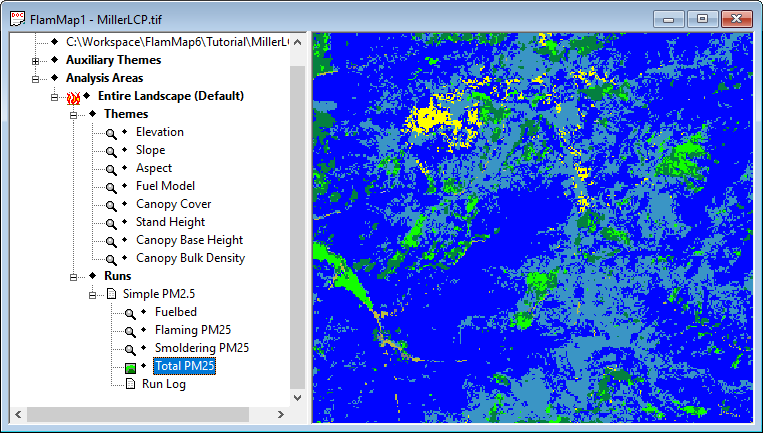
Next expand the ![]() Simple PM2.5 item in the Tree Pane and select the ♦Total PM25 grid theme to display. Note your display colors will be different with the randomly generated legends for SpatialFOFEM outputs.
Simple PM2.5 item in the Tree Pane and select the ♦Total PM25 grid theme to display. Note your display colors will be different with the randomly generated legends for SpatialFOFEM outputs.
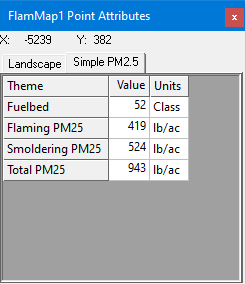 |
You can click around the Display Pane using the |
You should save this project by following the procedures from the Basic Lesson 1. Name the project "FOFEMtutoria1.fmp".
You now have completed the tutorial showing the basic steps in conducting a SpatialFOFEM run. The next tutorial will get you started using a shapefile mask for your SpatialFOFEM runs.