Even the most recently updated landscape from LANDFIRE (https://landfire.gov/) may not reflect wildfires, fuel treatments, or other disturbances within the past five years. Or you may want to model a landscape with planned fuel treatments to understand the implications on future fire behavior.
This lesson covers only the basics of using the Landscape Editor, other editing features, opportunities, and concerns are covered in the five sections of the Edit Landscape users guide.
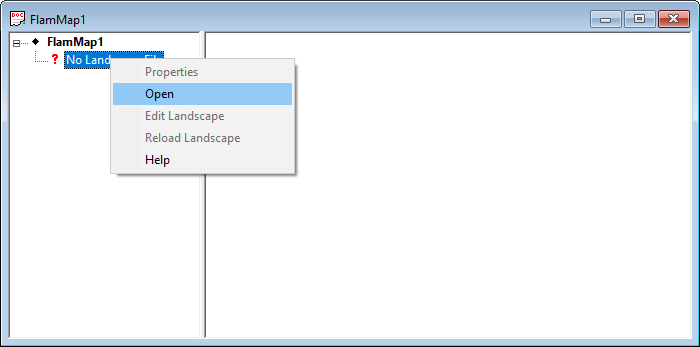
The first step is to load a Landscape into the default project; right-clicking on the ? No Landscape File item brings up a shortcut menu with just the Open and Help commands available.
Select the Open command from the shortcut menu to open a standard Window's "Open" dialog box. Navigate to the ...\FlamMap6\Tutorial\ folder and select MillerLCP.tif as your Landscape and click the Open button. Your "FlamMap1" project window will look like this.

Edit a landscape with the Landscape > Edit Landscape menu command or right-clicking on the landscape tree item and selecting Edit Landscape from the shortcut menu as shown below.

This opens the "Landscape Editor" dialog which will look like this.
![]()
To edit a landscape you will need to create "rules", which describe how to change a landscape theme. Create a rule with the Create Rule button in the upper left corner of the "Landscape Editor" dialog to open the "Create/Edit Landscape Rule" dialog.

Now create a simple rule to change fuel model 147 to 102.
 button.
The "Create/Edit Landscape Rule" dialog should look like this, where the changes are circled.

Notice the Rule Text, at the bottom of the dialog, is automatically updated as you develop the rule.
Click OK on the "Create/Edit Landscape Rule" dialog to return to the "Landscape Editor" dialog where you can apply the rule to the project landscape.
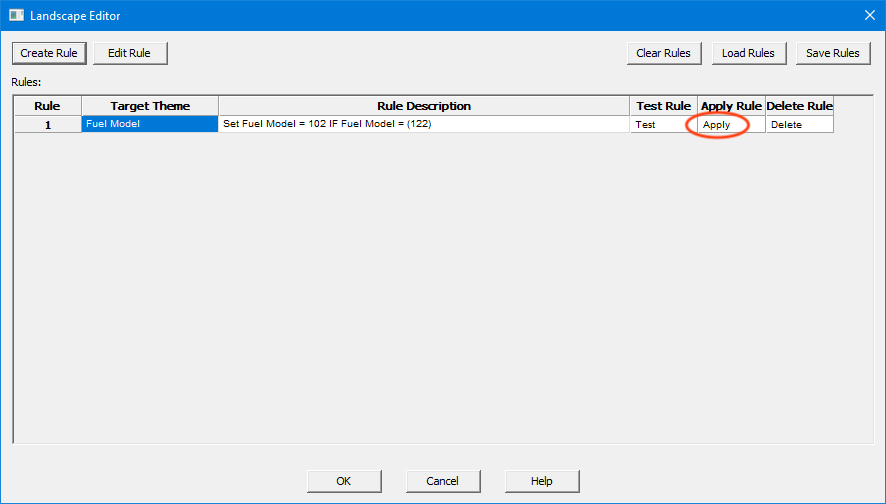
To apply the rule click the Apply command for the rule, circled above.

First, a dialog appears confirming you want to edit the landscape.

After confirming the edits, a dialog tells you how many fuel model rasters have been changed and asks if you would like to save the edits in a new landscape. Click Yes and then use the Save As dialog to save the new landscape as tutorialEdit1.tif.
|
|
|
|
Original fuel model theme before editing. |
Fuel model theme after changing 122 to 102. |
Important considerations after editing your landscape,
 button on the "Landscape Editor" dialog,
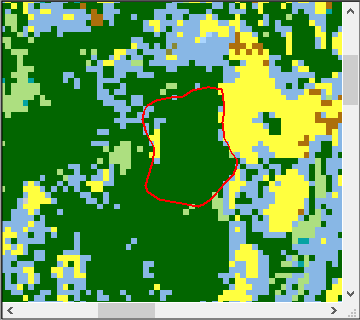
Next use a shapefile to mask an area for editing. Make sure the MillerTreatment.shp vector theme is displayed so you can easily see the results of your edit.
Select the Landscape > Edit Landscape menu command or right-click the landscape tree item and select Edit Landscape from the shortcut menu to open the "Landscape Editor" dialog. If you haven't closed your project since doing the basic edit above the rule will still be shown in the dialog.

Click the Create Rule button in the upper left corner of the "Landscape Editor" dialog to open the "Create/Edit Landscape Rule" dialog.
Now create a new rule to change fuel model within the MillerTreatment shapefile.
 button.
Click OK on the "Create/Edit Landscape Rule" dialog to return to the "Landscape Editor" dialog where you can apply the new rule to the project landscape.

To apply the rule click the Apply command for the rule, circled above. Confirm you want to edit the landscape and then save the new landscape as tutorialEdit2.tif. You may want to zoom in the see the result.
|
|
|
|
Fuel model theme before editing with a mask. |
Fuel model theme after changing mask area to fuel model 121. |
Remember, edit rules AND edited landscapes must be saved separately - they are not saved in a FlamMap Project (.FMP) or FlamMap Archive (.FZA).
When editing continuous variables, like canopy cover or canopy bulk density, usually a range of different values of the theme will need to be changed, not just one. Expressions can be used to edit all or some values of a theme by adding, subtracting, multiplying, or dividing all the values for a landscape theme by a set amount.
Select the Canopy Base Height theme to display. Open the "Landscape Editor" dialog and click the Create Rule button to open the "Create/Edit Landscape Rule" dialog.
To create a rule doubling the Canopy Base Height for fuel model 162.
button.
Click OK on the "Create/Edit Landscape Rule" dialog to return to the "Landscape Editor" dialog where you can apply the new rule to the project landscape.

Click the Apply command for the rule, circled above then confirm you want to edit the landscape and then save the new landscape as tutorialEdit3.tif.
|
|
|
|
Canopy Base Height theme before editing with an expression. |
Canopy Base Height theme after doubling values where fuel model is 162. |
You now have three rules and three new landscapes that show the progressive changes of the edits. You can save the rules by following the instructions in the Saving Edit Rules topic. Remember the edit rules are not saved in the FlamMap Project (.FMP) or FlamMap Archive (.FZA).
While this tutorial has shown three simple edit techniques, edits can be much more complex by combining the techniques into a single rule or changing the order in which the rules are applied. Check out the Complex Edits topic that explains the advantages and potential pitfalls of making multiple changes to the landscape.
Related Topics