This lesson will lead you through a simple Farsite simulation where you estimate the potential of a small fire to grow over the next two days. This lesson will utilize the WindNinja feature to model the winds over the terrain and limit the fire spread to a more realistic result by limiting the burning periods.
If you have closed your project or shut down FlamMap, you can reopen the project by selecting the File > Open command from the menu bar. In the "Open" dialog box select the file FirstTutorial.fmp and click the Open button. Your FlamMap project will display just the way it was when you last saved it.
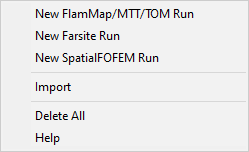
Right-click on the ♦Runs line in the "Tree" pane to display this shortcut menu.
Select New Farsite Run from the shortcut menu to open the "Farsite Run:New Farsite Run" dialog. The Weather Inputs tab is displayed.
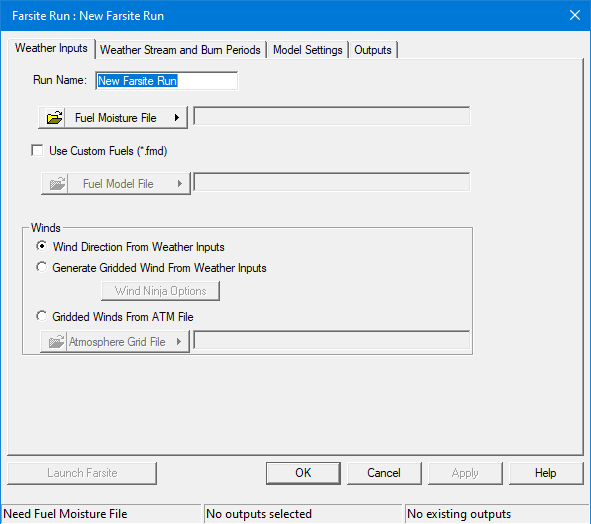
First thing, change the Run Name: to "Fake Fire" and click the Apply button.
Next, add in the initial fuel moistures. Farsite will condition the dead fuels throughout the simulation but the live fuels will remain constant from the values in the Initial Fuel Moisture (.FMS) file.
On the Weather Inputs tab click the
 button to display several
Fuel Moisture File
(.FMS) options, select the Open FMS File...
option. An "Open" dialog box appears, navigate to the C:\...FlamMap6\Tutorial\
folder and select the ERC97th.FMS file and click the Open
button. An edit dialog displaying the initial fuel moistures appears,
no edits are needed for this tutorial so simply close the dialog with
the
button to display several
Fuel Moisture File
(.FMS) options, select the Open FMS File...
option. An "Open" dialog box appears, navigate to the C:\...FlamMap6\Tutorial\
folder and select the ERC97th.FMS file and click the Open
button. An edit dialog displaying the initial fuel moistures appears,
no edits are needed for this tutorial so simply close the dialog with
the  button.
There are no custom fuel models in this landscape so you can ignore the Use Custom Fuels (*.fmd) option. Your Fuel Moisture Files text box will look like this.
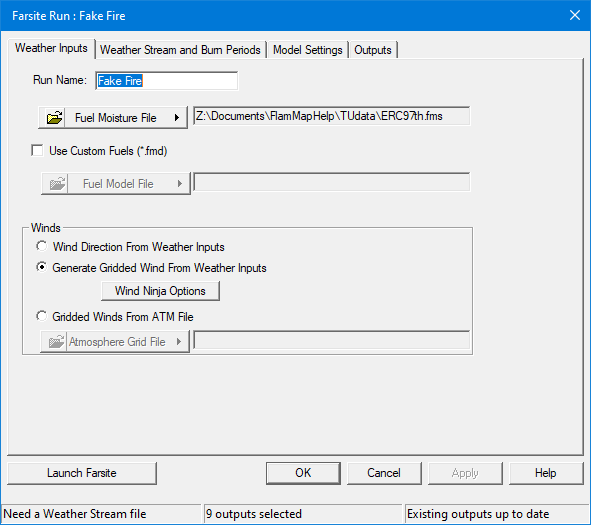
In the Winds group select the Generate Gridded Winds From Weather Inputs radio button. Farsite will then model the winds with the WindNinja Conservation of Mass solver for each burn period in the simulation. Click the Wind Ninja Options button to open the "Farsite Wind Ninja Options" dialog.

Using the default Resolution: of 30 meters for this landscape will utilize significant computational resources and take approximately 15 minutes. If you are in a hurry or have a lower end computer change the Resolution: to 60 meters. Notice this reduces the Number of Wind Ninja cells: by 75% and should now run in 3-5 minutes. Click OK to close the "Farsite Wind Ninja Options" dialog.
Click Apply on the Weather Inputs tab and move to the Weather Stream and Burn Periods tab. To exit the "Farsite Run:" dialog and continue later click OK. You should then save your project.
In the Weather Stream and Burn Periods tab you will select the weather periods for the simulation that Farsite uses to condition the dead fuels and identify burn periods.
Click the  button to and
select the Open WXS File... command.
An "Open" dialog box appears, and navigate to the C:\...FlamMap6\Tutorial\
folder. Select the OakKnoll2016.WXS file and click Open.
button to and
select the Open WXS File... command.
An "Open" dialog box appears, and navigate to the C:\...FlamMap6\Tutorial\
folder. Select the OakKnoll2016.WXS file and click Open.
The "Edit WXS File:" dialog opens displaying the weather observations available for the simulation.

We intend to run this simulation for burn periods on 7/21 and 7/22 so leave the Conditioning Start Date: and Time: at the default 7/15 setting.
Burn Periods are usually very important and need to be set for each day of the simulation. They can be set for 24 hours a day or any period during a day. Some knowledge of how fires burn is necessary to set burn periods accurately. Typically fires spread during the daytime dry hours and stop during the nighttime hours. But unless the nighttime period exceed the moisture of extinction the simulation continues to spread at a slower rate. While significantly slower this nighttime spread will often over predict what a real fire would do.
Burn periods must fall in the range of the loaded Weather Stream (.WXS) File.
For this simulation create two burn periods in the "Edit WXS File:" dialog. Scroll down to the 07/20/16 observations and select the check box in the Burn column for the 7/20 observations 08:00 thru 18:00.
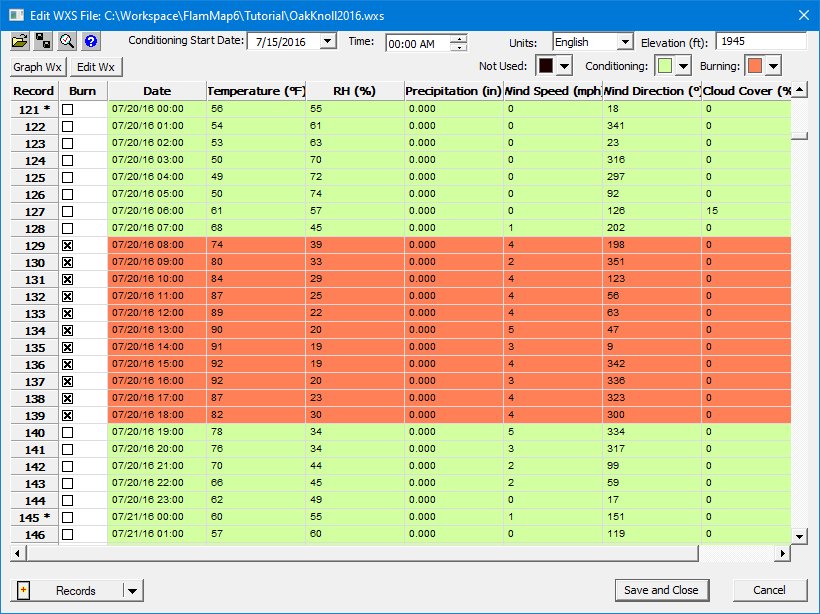
Next, scroll down to the 07/21/16 observations and select the check box in the Burn column for the 7/21 observations 07:00 thru 19:00. Now two burn periods and the conditioning start time are identified.
Click Save and Close to close the "Edit WXS File:" dialog and return to the Weather Stream and Burn Periods tab.
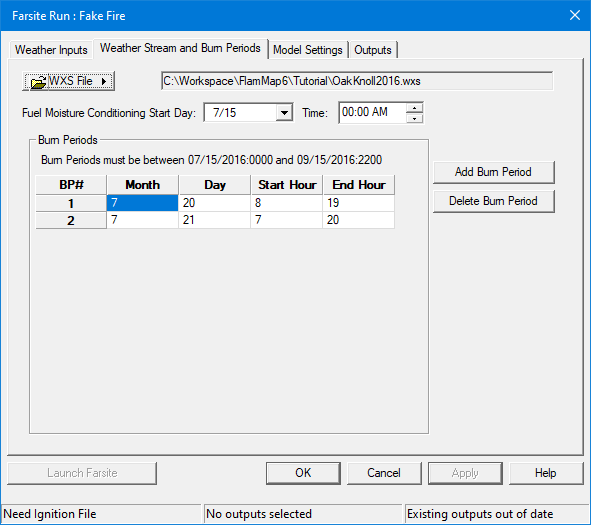
This gives a five day conditioning period prior to the start of the simulation and two burn periods, the first of 11 hours and a second of 13 hours.
In the "Farsite Run:" dialog click Apply and select the Model Settings tab. Or to exit the "Farsite Run:" dialog and continue later click OK. You should then save your project.
Now that the weather data is loaded and burn periods set you can continue setting up your Farsite simulation by selecting Model Settings tab in the "Farsite Run:" dialog.

Click the  button and select
the Open Ignitions File ... option.
An "Open" dialog box appears, navigate to the C:\...FlamMap6\Tutorial\
folder and select the FakeFire.SHP file, and click Open. A
red polygon should appear in the northwestern quadrant of your landscape.
button and select
the Open Ignitions File ... option.
An "Open" dialog box appears, navigate to the C:\...FlamMap6\Tutorial\
folder and select the FakeFire.SHP file, and click Open. A
red polygon should appear in the northwestern quadrant of your landscape.
For this simulation no additional barriers to fire spread are required
so ignore the  button.
There are eight model settings. For this simulation accept the defaults for Perimeter Resolution, Distance Resolution, Time Step, and Use Acceleration. Change the Ember Spot Probability: to 0.10 and accept the defaults for Spot Delay, Minimum Spot Distance, and Background Spotting Grid Resolution. More information on these settings is available in the Farsite Model Settings topic.
Leave the Foliar Moisture Content %: at 100, then select Scott/Reinhardt(2001) from the drop down menu for the Crown Fire Calculation Method:.
For this simulation no Rate of Spread (ROS) adjustments are required
so ignore the  button.
Click Apply and your Model Settings tab should look like this.
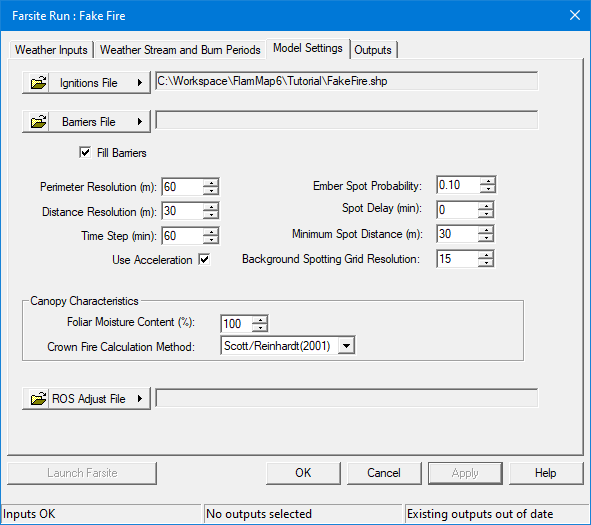
Notice the Status Bar message "Inputs OK" indicating the minimum inputs for a simulation are complete.
Select the Outputs tab to continue, or exit the "Farsite Run:" dialog by clicking OK. You can then save your project and continue later.
On the Outputs tab select the following outputs,
Notice that when you select Spread Vectors the Spread Direction and Rate of Spread outputs are automatically selected since they are required to generate the Spread Vectors outputs.
Make sure to click Apply and then click the Launch Farsite button to start your Farsite simulation. If the button is not available, check the Status Bar at the bottom of the "Farsite Run:" dialog to diagnose the problem.
This simulation should take 2-4 minutes. Since Farsite is single-threaded and uses only one core, you can do other work on your computer without slowing down the simulation.
You can use the "Farsite Progress" dialog to diagnose problems with your run, information for number of fires, spots, and perimeter vertices are displayed along with the simulation time. This information can help you adjust the Farsite Model Settings to run faster or provide better resolution.
Click OK on the"Farsite Progress" dialog, then click OK on the "Farsite Run:" dialog to return to the Tutorial project window.
Before viewing any of your outputs it's best to save your project. Then open the Evaluating FARSITE Outputs lesson to further explore the results of this run.