The Treatment Optimization Model (TOM) identifies areas where treatments will have the most effect at reducing fire spread across the landscape. There are a number of assumptions of this analysis that are discussed in the Technical Topics. Since TOM uses the MTT Major Paths to identify landscape fire spread it is recommended you complete the Minimum Travel Time lesson before attempting this lesson.
The Burn Probability and TOM features in FlamMap can be very computer intensive and take a long time to complete runs. However this tutorial uses a small landscape designed to work in a reasonable time on a computer with the recommended requirements found on the FlamMap website.
The data files for this tutorial are found in your ...FlamMap6\Tutorial\ folder.
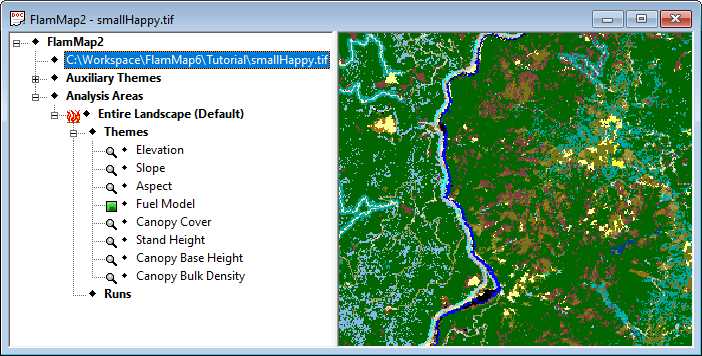
First load the smallHappy.tif file into an new FlamMap project.
Next, create a new FlamMap run. For a treatment optimization run the Inputs Tab is identical to other FlamMap runs. Like all FlamMap runs you can utilize gridded wind and conditioning periods, but this lesson will use a single wind speed/direction and initial fuel moistures.
Fill in the Inputs tab as shown below.
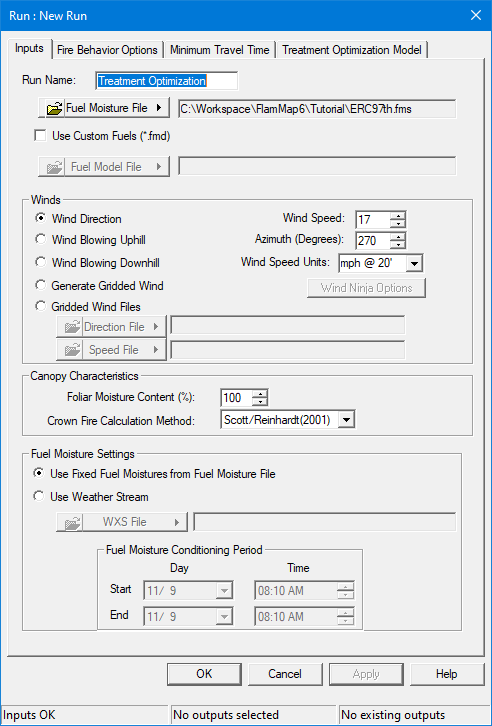
It is important to emphasize one of the major FlamMap assumptions at this point; all wind and fuel moisture conditions are constant. When a conditioning period is not utilized they do not even vary by aspect, elevation, or shading. In this run FlamMap will use the fuel moisture values in the Fuel Moisture (.fms) File for all calculations.
For TOM runs winds should be either from a specific direction or use a wind grid (which would also be generated from a specific speed and direction). You should also know the ignition pattern or file to be used at this point also, this will become obvious when you load the ignition file later in the lesson.
Make sure to click the Apply button before moving on to the next step.
There are a few parameters you need to change on the Minimum Travel Time tab as the Inputs, Barriers, and Outputs groups on this tab also apply to treatment optimization runs.
Change the Spot Probability: to 0.25 and the Resolution of calculations to 60. You can also add any additional outputs you would like from this tab.

Make sure to click the Apply button before moving on to the next step.
Next select the Treatment Optimization Model tab in the "Run:" dialog box.

For the Ignition
File: you can use an existing shapefile made elsewhere or create a shapefile
in FlamMap. For this run we will use an existing shapefile named smallWestIgnition.shp.
Click the  button use the "Open"
dialog navigate to ...FlamMap6\Tutorial\ folder and select the smallWestIgnition.shp
file.
button use the "Open"
dialog navigate to ...FlamMap6\Tutorial\ folder and select the smallWestIgnition.shp
file.
Set the Resolution of calculations to 60. This sets the node spacing for the fire behavior calculations as well as the grid output cell size.
Click the  button next
to the Ideal
Landscape: text box and in the "Open" dialog navigate
to …FlamMap6\Tutorial\
folder and select the smallHappyIdeal.tif file.
button next
to the Ideal
Landscape: text box and in the "Open" dialog navigate
to …FlamMap6\Tutorial\
folder and select the smallHappyIdeal.tif file.
Change the Maximum Treatment Dimension (m): spin box to 300.
Leave the Iterations/Treatment Level (1-5): spin box at the default of 1.
Set the Treatment Fraction: spin box to 0.20.
Click the Select All button, we'll be looking at all the possible TOM outputs.
Your "Run:" dialog should look like this.
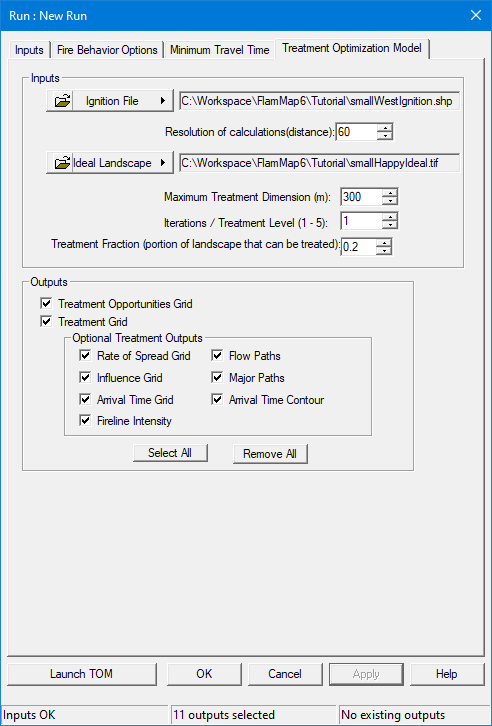
Make sure to click the Apply button, if all the setting and inputs are selected the Launch button will become active. But just click the OK button for now to close the "Run:" dialog box, we are going to explore the ideal landscape for a few minutes before completing the run.
The key to creating a meaningful TOM run is the ideal Landscape File. The ideal Landscape contains all the information for the possible fuel treatments on the landscape. Thus all possible fuel treatments need to be described in terms of the five fuel themes contained in a Landscape; fuel model, canopy cover, stand height, canopy base height, and canopy bulk density.
To view the ideal Landscape;
expand the run item ![]() Treatment
Optimization by clicking the
Treatment
Optimization by clicking the ![]() icon in
the "Tree" pane to show all the output items,
icon in
the "Tree" pane to show all the output items,
expand the ♦Ideal Landscape Themes item to show the landscape themes,
select the ♦Ideal
Landscape Themes > ![]() ♦Fuel
Model item to make it the active theme.
♦Fuel
Model item to make it the active theme.

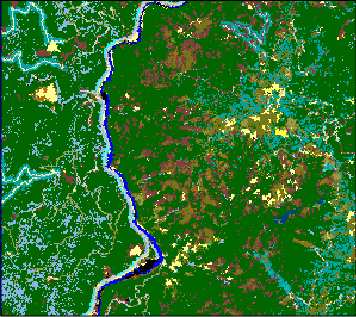
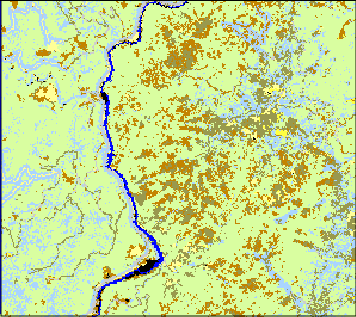
The existing and ideal landscape should have same default legend (Standard 53) so you can click between the two fuel model themes to see how they differ. They are shown side by side below.
|
|
Existing landscape Fuel Model theme. |
Ideal landscape Fuel Model theme. |
In the ideal landscape the fuel model 122 was changed to fuel model 121, fuel models 142-149 were changed to 141, fuel models 162-165 were changed to 161, and fuel models 182-189 were changed to 181 to simulate treatment. Grass fuel models 101-109 were not changed.
These are only the changes to the fuel model themes, but all the landscape themes affect fire behavior, so review the others to understand what kind of changes were made in the ideal landscape to reflect treatments.
Read more about the ideal landscape and make sure to view it while evaluating your TOM outputs.
Reopen the "Run:" dialog box by double clicking the ![]() Treatment Optimization item.
Treatment Optimization item.
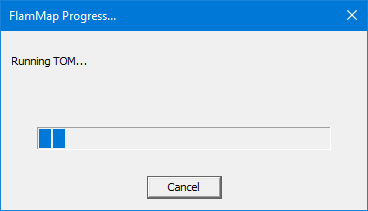
Click the Launch button to begin your TOM run, you should see the following "FlamMap Progress…" dialog. If the Launch button is not available, click the Apply button first, if the Apply button is not available check the inputs on the Treatment Optimization Model tab.
Depending on your computer the run should take between 10 and 60 minutes.
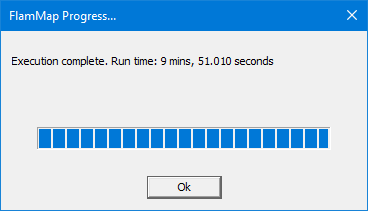
When the run is completed, click OK to return to the "Run:" dialog. Now click the OK button in the "Run:" dialog to return to the "Project" window where you can view the outputs of the run.
After closing the "Run:" dialog box expand the ![]() Treatment Optimization run item (by clicking
the
Treatment Optimization run item (by clicking
the ![]() icon) in the "Tree" pane
to show all the output items.
icon) in the "Tree" pane
to show all the output items.
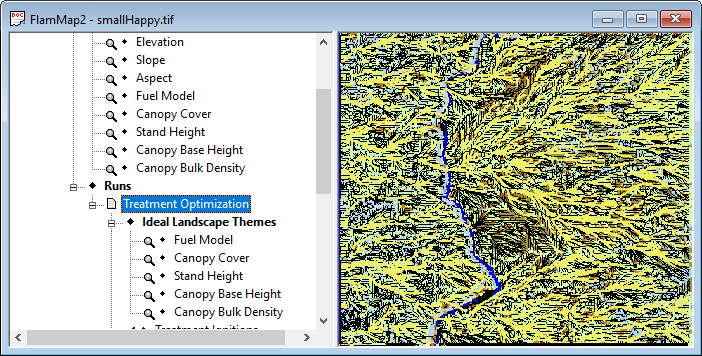
Yes, it looks like quite a mess but you should save the project at this point with the File > SaveAs command. Select a name for the project, don't just use the default FlamMap1 name, and remember the directory where you saved it. Then open the Evaluating TOM Outputs lesson to further explore the results of this run.
Related Topics